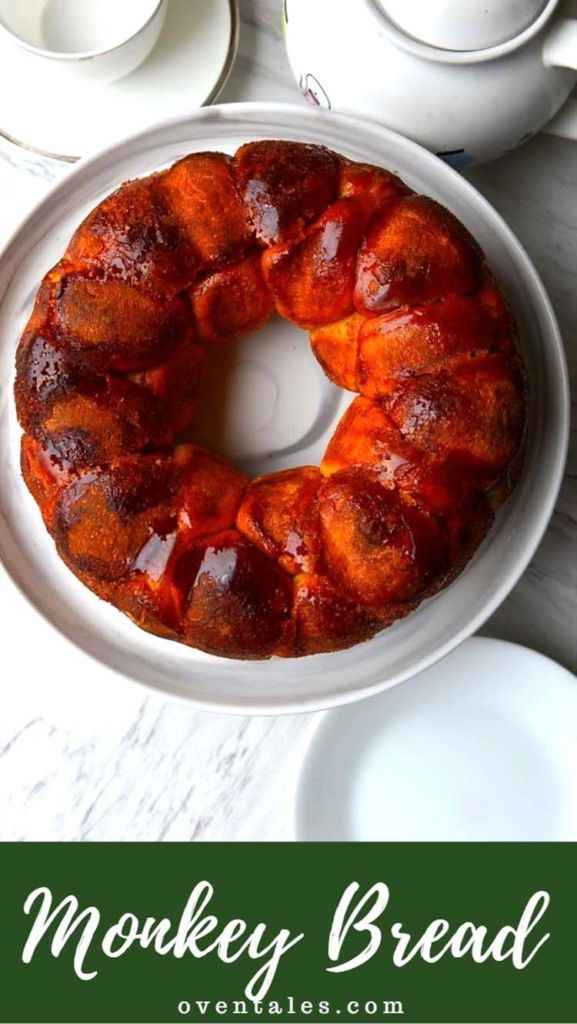
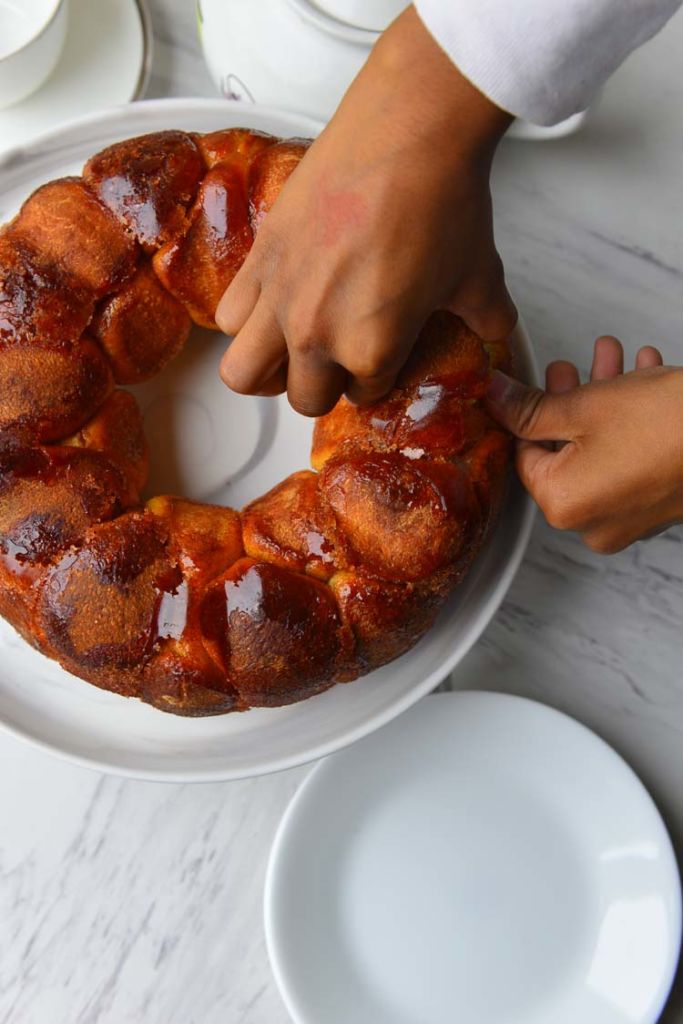
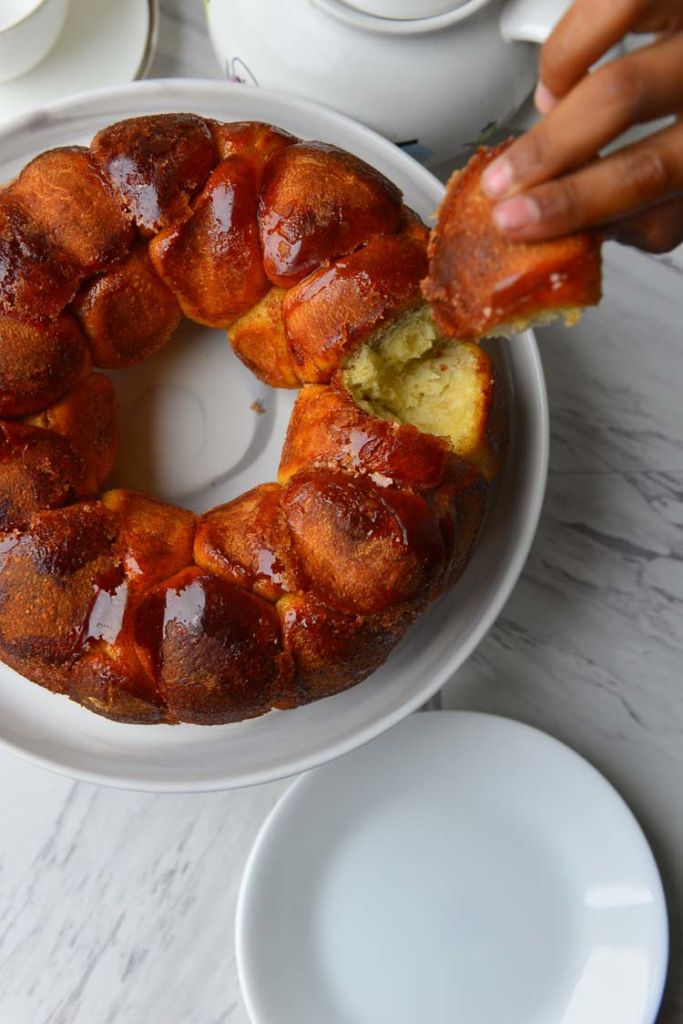
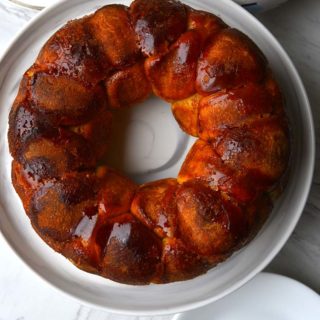
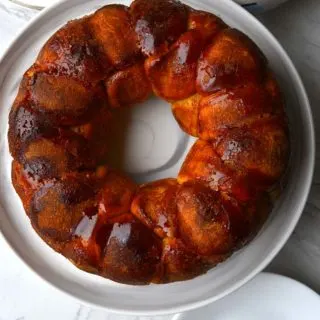
Here is a fun dessert to share – Monkey Bread . It is also known as pull apart bread , stick it bread , pluck it cake and by many other names . Did you notice that all the names have some reference to it either being messy, hands on or sticky ? This may not be something you want to serve when you are thinking of impressing the in-laws but definitely fit for sharing with friends you have fun with.

Disclaimer – no monkeys were harmed in the making of this dessert. We wholeheartedly support the monkey’s right to exist in the wild especially in light of the fact that over 90% of human and monkey DNA is the same !
Now that is our of the way it is time to ask – what is monkey bread? It is small bites of pastry baked together and coated with a sweet cinnamon (or similar sweet spice). The reference to the monkey comes from the fact that one has to tear off the pieces with one’s hands. I know this is not very enlightened name. It could very well be that some one’s inner monkey was let loose when they came up with this moniker.
So here is my monkey bread from scratch – good old-fashioned enriched yeast dough rolled into small balls and coated with butter and cinnamon sugar. This monkey bread is made from scratch – with all real ingredients and nothing canned. No – there is no canned cinnamon roll dough or biscuit dough or pastry dough here.
All right that description was not meant to make you dash for the frozen dessert isle. It sounds like a lot , but here is the fun part – you don’t have to do it all in one go . The dough is absolutely fine if you can let it rise slowly in the fridge – overnight or till you are done running errands. For longer rises use only a quarter of the yeast in the recipe.
Put the kids to work ! Summer is not for slacking off – and generally kids have fun with messy things. Rolling and punching the dough is a job they would love to do . Making the dough on the other hand could get a little messier than you imagined , but the trick here is to start the mixing in a bowl . Once the dough has come together transfer to a flat working surface sprinkled with plenty of flour and let the little hands accomplish the rest.
Shaping the bread is another step that little kids will enjoy. Rolling pieces of dough into smooth balls and rolling in cinnamon sugar are fun activities . I have used a Bundt pan here – but you could experiment others. (ex. cake tins shaped like Micky Moise cutouts).
This is also a good time to introduce some biology and math lessons – but I am not going to go there. The other day I was warned by someone in the know “Mom, don’t turn everything to a science lesson – you are taking the fun out of it!” Mr.Teen science can be fun – especially when you are covered in flour 😉 . But I get it, sometimes it is just fun. See I LISTENED – so now it is your turn to put on the listening ears !

When to serve it ? Really you have to ask ! Well this is perfect for a special breakfast. You could let it rise in the fridge overnight , shape and bake in the morning. Or you could make it for dessert and for an extra special (read sweet) treat pour a simple glaze over it. In short make it on holidays , summer or just about any time you want. I personally will be make it to celebrate the first day of summer break.
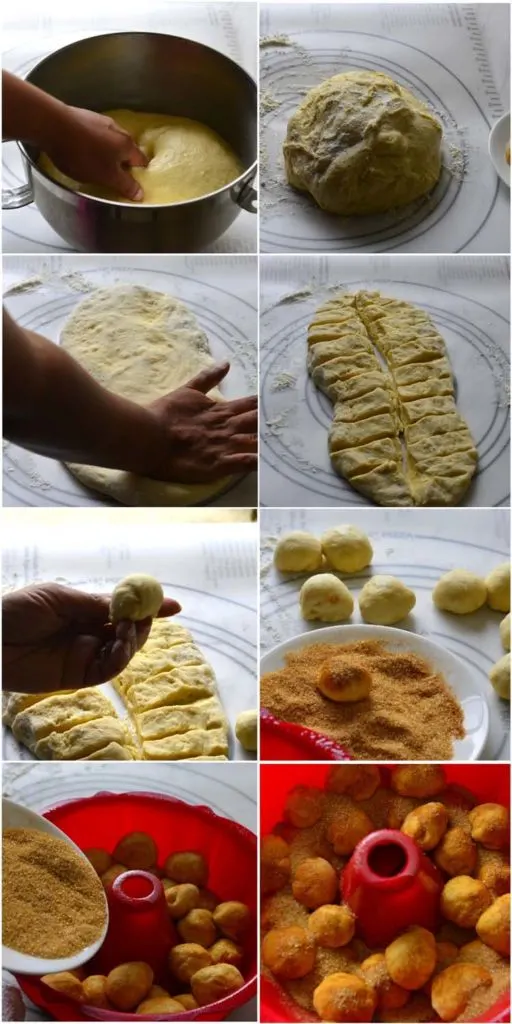
Here is the recipe in pictures

If you are baking with kids , just have them watch the second rise. It is interesting to see the little dough balls expand and see the sugar coating spread out.
Game plan for cooking with kids
This is a perfect way to keep 1 – 4 kids occupied for 30 minutes to 1 hour .
What You Need : Kitchen scale , Rulers , Dinner knives / bread knife
Concepts : Comparing Numbers, Division, Measurements, Geometry, Shapes and Volumes
-
- Make dough (if they are old enough let them knead after the dough comes together).
- Deflate (punch it down) the dough. Optionally weigh the dough before and after deflating. Note the changes in volume and weight (Volume decrease , weight stays the same unless you have a very sensitive scale).
- Weigh the dough and and ask the children to eyeball it and divide into equal portions – one portion per child. Weigh each portion and and compare the weight and make adjustments if necessary.
- Make dough rectangles. Dust the work surface and give each kid a piece. Have plenty of extra flour available on hand. Have each kid stretch or roll his/her piece into a rectangle, no restriction on dimensions .
- Measure and divide. Ask the children to measure their rectangles using a ruler. Ask them to divide each rectangle into 4 equal portions. Divide each quarter into smaller pieces (fractions , division).
- Roll each piece of dough into a smooth ball (talk about volume and surface area)
- Brush with butter and coat with cinnamon sugar. (Just fun ) Arrange in the Bundt pan.
- Optional – Weigh the pan with the dough at the start and end of the second rise and notice the change in volume and weight (is there any ?)
- Proceed with the recipe.
You could avoid all the science and math talk and just have fun too 🙂 .
Monkey Bread
Ingredients
For the Dough
- 4 C All-Purpose flour (450 g ) + extra for dusting
- 1 C Milk Warm (240 ml )
- 1/4 C Water Warm , use as needed
- 1 Egg
- ¼ cup Sugar (50 g )
- 2 Tbsp Butter Softened
- 2¼ Tsp Active Dry Yeast (7g or 1 pkt)
- 1 ½ Tsp Fine Sea Salt (7g)
For the Brown Sugar Coating
- ¾ C Light Brown Sugar
- 2 Tsp Cinnamon Powder
- ½ C Unsalted Butter (110g or 1 stick ) Melted
For the Glaze
- 1 C Powdered Sugar / Confectioner’s Sugar
- 2 Tbsp Milk
To Bake
- 12 C Bundt Pan
- 2 Tbsp Butter
Instructions
Make the Dough
- Warm the milk (just warm to touch) and soften the butter. Bring the egg to room temperature. Activate the yeast by mixing it in ½ c milk mixed with 1 tsp of sugar. Set aside until it is bubbly.
- Take the flour in a mixing bowl, mix in the sugar and salt.
In Stand Mixer
- With the paddle attachment on mix the dry ingredients for 30 seconds. Remove the paddle. Make a well in the center of the mix and add the activated yeast mix along with milk and softened butter and 1 egg. Attach the dough hook. Turn the mixer on the lowest setting and mix for 1 minute. Scrape the sides if needed and mix on the recommended dough setting (kitchenaid speed 2 )for 3 to 4 minutes until the dough comes together into a soft smooth ball. 2 minutes into mixing check the dough. If it looks stiff and dry add 1 to 2 tbsp of water. If the dough seems to stick to the sides and not come together scrape the sides. It should not take longer than 5 minutes of mixing.
By Hand
- Place the dry ingredients is a wide mouthed bowl or on a clean work surface . Mix lightly and make a well in the middle. Add the activated yeast and half the milk along with a beaten egg. Lightly mix and start kneading by incorporating more of the dry ingredients to the wet. Slowly add more of the remaining milk as you knead. The dough should stat coming together into one big mass. Add the softened butter and knead it in . If the dough sticks to the surface dust with a little flour and keep kneading . As you knead the texture of the dough changes and it relaxes a bit. Do a window pane test (See Notes) to see if the dough is ready. If not knead for another couple minutes and test a gain. 10 to 15 minutes of kneading by hand is all it is going to take.
1st rise.
- Form the dough into a smooth ball. Place it in an oiled bowl. Turn the ball to coat all sides with oil. Cover with an airtight lid or moist kitchen towel and set aside to rise in a warm place. It takes about 1 to 1 ½ hours.
Prepare the Pan
- Soften 2 tbsp of butter . Liberally coat the insides of the bundt pan with butter – making sure to get into all nooks and crannies and the center tubing section. Set aside.
Shape and 2nd rise
- Mix brown sugar and cinnamon together in a bowl. Melt the butter in another bowl. Set aside.
- Punch down the dough . Turn it out onto a lightly floured work surface. Roll out or stretch into a rectangle. Use a knife or pizza cutter to divide the rectangle into 24 equal section (or 36 or more ).
- Roll each piece of dough into a ball. Taking one ball at a time brush with the melted butter and roll in the cinnamon sugar and place in the pan. Arrange the balls evenly all around he pan. Keep layering the balls until all are used up. Sprinkle the remaining cinnamon sugar evenly over the dough and drizzle any remaining melted butter.
- Cover the pan with plastic wrap or wet towel and place in a warm area until the balls look almost doubled in size - about 30 to 45 minutes.
Bake
- Place the oven rack in the middle and preheat oven to 375°F (190°C). When ready to bake uncover and place the pan in the hot oven. Reduce the temperature to 350°F (175°C) and bake until the top is browned and you see the caramel bubbling on the sides - about 30 to 35 minutes. Cool in the pan for 5 minutes only. Turn out on to a serving platter or to a cooling rack if serving later.
Optional glaze
- Mix the powdered sugar and milk in a small bowl until the you get a smooth mix. Slowly pour the glaze over the bread letting it drop down the sides of the bread.
Serve warm.
Notes
- You can plan ahead and have the dough rise in the fridge overnight. Reduce the yeast by half if doing so. If planning to leave in the fridge longer – say 24 to 48 hours reduce the yeast to a ¼ of what is used in the original recipe. When ready take out of the fridge, and let it rest for 20 to 30 minutes before proceeding to shape.
- Do not allow the bread to cool in the pan for longer than 5 minutes. The glaze hardens as it cools and making the bread stick to the pan.
- For an egg free alternative do not use the egg and increase the milk by a couple tablespoons.
- Windowpane test - take a small ball of dough and stretch it into a rectangle using your fingers and hold it against light . When enough gluten is developed the dough can be stretched into a thin sheet that lets light through.
Important: Nutrition Values are estimates. Actuals vary based on ingredients and serving size.
Note: I don’t always coat the dough balls in butter. The pieces do stick a little but can still be easily be pulled apart.